Monday, July 20, 2009

Rockin' Attitude


Click on image to view full size

I use PSP 7, but assume this can be made with any version

Supplies:

Tube of choice
I used the wonderful art of Ismael Rac,
you must have a license to use his work
which you can purchase at AMI

PTU Rockin' Attitude kit by
Jessica of Gothic Inspirations,
which you can purchase here

Jessica's site has so many wonderful scrap kits,
PTU & Freebies!!!
Thank you Jessica!

Plug ins:
Eye Candy> gradiant glow
Mura's Meister>Copies
Xero>Radiance

Font of choice

~~~*~~~
This one is short and easy!

Open new image 800 x 800 (we will re-size later)
flood fill white

Open bling silver>re-size to 800 x 800
copy>paste as new layer

Open heart skull 1>re-size to 800 x 800
copy>paste as new layer

Add a new raster layer above heart skull layer
Add text of choice
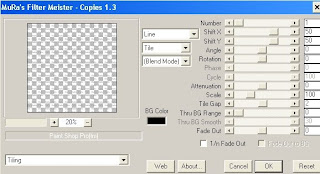
Apply Mura Meister>Copies


Select heart skull layer>float>defloat,
then go back to your text layer
>selections>invert>delete.
Now your text should be only be covering your skull layer.
Apply drop shadow to the text layer if you like.

Select heart skull layer again>float>defloat
Copy>paste your tube
Invert>delete then copy>paste your tube again>delete
(I re-sized the tube 150% for this layer)
(see my tag for placement)

Apply Xero>radiance>default settings
to first tube layer>
change blend mode to hard light

Open guitar>re-size to 800 x 800
Copy>paste guitar above background layer
Add drop shadow

Resize your tag to 600 x 600

Open electric guitar> re-size 30%
copy>paste as new layer
rotate 35 degrees right
layer > duplicate
layer > mirror
Position them in the center bottom of your tag
(see my tag for placement)
Add Eye Candy> gradiant glow>thin>default setting

Now add your name and copyright if needed
delete your white layer and save as a PNG and your finished!

Rock on!!!

Sunday, July 19, 2009

Challenge-Chance to win 3 tubes of choice!!

Want a chance to win three tubes of your choice from either MPT or AMI? Here it is - click HERE for all the details - and spread the word!

New PSP Forum

Lori and I have opened a new PSP Community - and you're invited! It's brand spanking new - and we have lots in store for everyone - including exclusive scrap kits and other goodies. We will be hosting a grand opening party - and will be giving away tube prizes! Details will be posted later.

Hope to see you all over at

Saturday, July 18, 2009

Oh Baby!


Click on image to view full size

I use PSP 7, but assume this can be made with any version

Supplies:

Tube(s) of choice
I used the awesome art of Amy Matthews from AMI
you must have a license to use her work.

Template 001 by Cin, you can snag it at her awesome new blog here

Thank you Cin!


Plug ins:
Xero >radiance
Mura's Meister >copies
DSB Flux>Bubbles
Penta > dot & cross
Eye Candy>Gradient glow
Filters Unlimited
(or you can use a gradient flood fill)

Font of choice, I used MA Sexy

~~~*~~~

OK, let's get started!

Open your template>duplicate>close original.
Delete copyright layer.
Re-size to 800 x 800

Since pink is my fav color, I left the template colors
as they were, but you can always colorize
it to match your tube and tastes!

With the eyedropper tool,
choose a color from your template (or tube)
and flood fill layer 2.
Apply Xenofex>constellation


Still on layer 2 > selections
>select all > float>defloat>
copy>paste your tube
selections>invert>delete>select none.

Apply drop shadow and Xero>radiance>default settings
and change the blend mode to luminance.

Add a new raster layer above layer 3.
Add text of choice(I used OH BABY size 12, white)
Apply Mura's Meister>Copies

Select layer 3>float>defloat,
then go back to your text layer
>selections>invert>delete.
Now your text should be only in layer 3.
Apply drop shadow to the text layer if you like.

Select layer 4. Apply DSB Flux>Bubbles
with the following settings 3 times

Select layer 5, your color from step one
should still be your foreground
and select white as your background
Apply Filters unlimited with the settings below
or just flood fill the layer with a gradient.

Apply Penta>dot & cross


Apply Eye Candy>Gradient glow>fat>default settings
to the following layers:
layer 5
layer 6
circle
swirls

Select your mask layer and apply Xenofex>constellation


Copy>paste your tube right below the Oh Baby layer,
delete any portions of the tube
you don't want showing below the template.

If you want you can colorize the frame and word art-
I used Flaming Pear>super blade pro to make mine pink.

Now re-size your tag to 600 X 600.
Add your name,
and your copyright if needed,
save as a PNG and
Oh Baby you're finished!!

I hope you had fun with this tut!

Friday, July 17, 2009

My 1st Blog Award


I received this sweet award from my dear friend Lori at Wacky Scraps!
Thank you so much Lori!!

I would like to pass this award on to Jessica at Gothic Inspirations

Thursday, July 16, 2009

Cupid


Click on image to view full size

I use PSP 7, but assume this can be made with any version

Supplies:

Tube of choice
I used the awesome art of Dominic Marco ,
which you can now purchase at CILM
you must have a license to use his work.

PTU scrap kit "Cupid" by ScrappingMar , which you can purchase
at the Paradise 4 Scrappers store here

Template 58 by Yvette of Essense of Creativity
which you can download here


Plug in: Xenofex>Constellation

Font of choice

~~~*~~~

OK, let's get started!

Open your template, duplicate and close the original.
Re-size to 800 x 800
(we will be re-sizing it smaller at the end)
Delete copyright layer.

Flood fill white your background layer.

Select big heart layer, selections>select all>
float>defloat >Copy and paste paper 21
as a new layer>
selections invert>delete>
delete the original template layer.

Now apply drop shadows:
V=3 H=3 O=60 B=5
and V= -3 H= -3 O=60 B=5

Apply the above steps to these layers:
~Small Hearts with paper 11
~Rectangle layer with paper 12
~Dotted heart layer with paper 26


Open element 6>re-size 80%>copy>
paste above white layer
rotate right 15 degrees
add drop shadow
V=3 H=3 O=60 B=5

Open element 8>copy>paste atop element 6
add drop shadow

Open element 7>re-size 90%
copy>paste atop element 8
add drop shadow

Copy>paste element 16 atop element 7
add drop shadow

Select your big heart paper layer
selections>select all> float>defloat
open element 45>paste into selection
apply Xenofex>constellation with these settings:

Selections>select none

Copy>Paste your tube of choice (I re-sized mine 125%)


Now we are going to have some fun and embellish the tag!
Feel free to get creative here and use the elements that
best match your tube. Here's what I used:

(see my tag for placement)

Open element 2>re-size 25%
copy>paste along left side of template
drop shadow

Open element 7>re-size 30%
copy>paste along left side of template
drop shadow

Open element 10>re-size 30%
copy>paste along left side of template
drop shadow

Open element 30>re-size 30%
copy>paste at bottom of flower stem
drop shadow

Open element 20>re-size 50%
copy>paste along right side of template
drop shadow


Now resize your tag to 600 X 600.
Add your name, and your copyright if needed,
delete your white layer and save as a PNG and that's it!!

Thanks so much for trying my tut!!

Tuesday, July 14, 2009

Aloha from Hawaii

Click on image to view full size

I use PSP 7, but assume this can be made with any version

Supplies:

Tube of choice
I used the sexy art of Andy Screen ,
which you can now purchase at MPT
you must have a license to use his work.

FTU scrap kit "Sherbet Trio" by Lori at Wacky Scraps ,
which you can download here

Lori site totally rocks!! Tons of awesome freebies!!!!

Template "Aloha" by Stef at
Freebie Friends Scraps & More
which you can download here


Plug ins:
Xero>radiance
DSB Flux>Bright Noise
Eye Candy >Gradient Glow

Font of choice

~~~*~~~

OK, let's get started!

Open your template, duplicate and close the original.
Resize to 700 x 700. (we will be re-sizing it smaller at the end)
Delete copyright layer,
all 3 lil circle layers and their frame layers
and the small word art layer.

Flood fill white your background layer.

Select big circle layer,
selections>select all> float>defloat
Copy and paste paper brown as a new layer>
selections invert>delete>
delete the original template layer.

Now copy and paste your tube of choice into the circle
>selections>select none
(I used a close up of my main tube)

Apply Xero > Radiance > default settings
and change the blend mode of the layer to luminance.

Select big circle frame layer,
selections>select all> float>defloat
>Copy and paste paper orange
as a new layer>selections invert>
delete> select none
and delete the original template layer.

Apply DSB Flux >bright noise>intensity 44>mix

Apply Eye Candy Gradient Glow>color: Fat >default setting.

Now apply drop shadows:
V=3 H=3 O=50 B=5
and V= -3 H= -3 O=50 B=5

Apply the above steps to these layers:

Tree with paper teal

Square with paper multi

Square frame with paper brown 1

Select large word art layer>
selections>select all> float>defloat >
Copy and paste into selection paper orange 1
and apply the noise,
gradient glow and drop shadows
same as above.
I moved the word art to the bottom
of the template
(see my tag for placement)

Copy and paste your tube(I mirrored mine)
and place on right side of big circle layer
apply a drop shadow
V=3 H=3 O=50 B=5

Copy>paste circles 2 above your background layer
Apply drop shadows:
V=3 H=3 O=50 B=5
and V= -3 H= -3 O=50 B=5

Now resize your tag to 600 X 600.
Add your name, and your copyright if needed,
delete your white layer and save as a PNG and that's it!!

Mahalo for trying my tut!!


My dear friend Kristi aka Hubbys tried my tut-Great tag Kristi!!


Tuesday, July 7, 2009

Sugar & Spice


Click on image to view full size

I use PSP 7, but assume this can be made with any version

Supplies:

Tube of choice
I used the awesome art of Elias Chatzoudis, which you can purchase at MPT
you must have a license to use his work.

Template 172 by Gina, you can snag it at her awesome blog here
Thank you Gina!

Mask 173 by Vix, you can find her wonderful masks here
Thanks Vix!!

Plug ins:
Xero: radiance
Penta: jeans and color dots
Eye Candy: Gradient glow and glass

Font of choice

~~~*~~~

OK, let's get started!

Open your template>duplicate>close original. Delete copyright layer.
Open your tube(s) of choice and select
one light color for your foreground and
one dark color for the background.
Change your foreground to gradient>style sunburst.
Select circle 1>float>defloat>flood fill
Apply Eye Candy glass>bevel profile:button
with the following settings:


Copy>paste your tube>selections invert>delete>select none
Change the blend mode to luminance
Add a drop shadow to the circle layer
Apply the same steps to circle 2.

Now change the foreground color from gradient to solid.
Select outer frame>float>defloat>flood fill with your light color
Apply Penta>Jeans>default settings

Paste your tube>selections invert>delete>select none in both frames
Apply Xero>Radiance>default settings to both tube layers
Drop shadow tube layers and frame layer.

Select cluster frame>float>defloat>flood fill with your darker color
Apply Penta>Color Dots>default settings> select none.
Add drop shadow.

Select middle frame>float>defloat>flood fill with white.

Paste your tube in center of template>add drop shadow.

Arrange the word art around the top of the tag.

Flood fill the sugar, spice and nice word outlines with
your dark color.
Apply Eye candy>gradient glow>fat with
the following settings:


We are almost finished!

Change your foreground color
back to gradient >style Linear>invert checked
Flood fill your white layer and apply
Vix mask 173, delete mask and flip layer

Now resize your tag to 600 X 600. Add your name,
and your copyright if needed, save as a PNG and it's done!!

I hope you had fun with this tut!!

Friday, July 3, 2009

Morning Delight


Click on image to view full size

I use PSP 7, but assume this can be made with any version

Supplies:

1 Tube of choice
I used the wonderful art of Dean Yeagle,
you must have a license to use his work
which you can purchase at CILM

PTU Scrap Kit Morning Delight (tagger size) by ScrappinDsigns ,
which you can purchase at the Paradise 4 Scrappers store here


Template 173 by Gina, you can snag it at her awesome blog here
Thank you Gina!

Mask Other world fae by Sabre, which you can find here
Thank you Sabre for all your wonderful goodies!

Font of choice, I used MA Sexy

~~~*~~~

Open the template, duplicate and close the original.
Change canvas size to 800 x 800> flood fill white.
Delete the credit info layer

Select the flower swirls layer>float>defloat
Copy>paste paper 15>
selections>invert>delete>select none.
Lower the opacity of the template layer to 50.

Select the leaf swirls layer>float>defloat
Copy>paste paper 16>selections>invert>delete>select none
drop shadow V=3 H=3 O=50 B=5
Delete original template layer

Apply the same steps to the large scalloped layer, using paper 5,
smaller scalloped paper using paper 20,
Oval fill layer using paper 17
and oval frame layer using paper 16

Select the bracket layer>float>defloat
Copy>paste paper 1>selections>invert>delete>select none.
Delete template layer
Apply texture effects>blinds
Apply drop shadows V=3 H=3 O=50 B=5
and V= -3 H= -3 O=50 B=5

Copy>paste your tube of choice and position
slightly off center,
apply drop shadow V=3 H=3 O=50 B=5

Copy>paste ribbon 1>mirror
and place along bottom of template>drop shadow

Copy>paste ribbon 2 and place atop ribbon 1>drop shadow

Copy>paste branch and place atop the ribbons>drop shadow

Open bird>re-size 50% and
paste at bottom left side of template
apply drop shadow V=3 H=3 O=50 B=5

Open flower 005>re-size 50% and paste
at bottom left corner of template
apply drop shadow>layer duplicate>mirror
and place a bit below the original flower layer
(see my tag for placement)

Copy>paste green flower on right side of tag>drop shadow

Open pretty butterfly>re-size 50%
and paste at top left side of tag>drop shadow

Copy>paste tulle 3 above your white background layer,
move towards top of tag>duplicate>flip> and move the
duplicated layer towards bottom of tag.

Copy>paste tulle 2 under your tube layer
and apply drop shadow V=3 H=3 O=50 B=5

Copy>paste paper 4 above your white background layer
apply mask>delete mask

Resize entire tag to 600 x 600.
Add your name, I used stroke white and fill #8FB700
Now just add your copyright if needed
and delete your white layer and save as a PNG!

I hope you enjoyed making this tag!

Wednesday, July 1, 2009

Red, White & Blue

Click on image to view full size

I use PSP 7, but assume this can be made with any version

Supplies:

Tube of choice
I used the wonderful art of Elias Chatzoudis,
you must have a license to use his work which you can purchase at MPT

PTU Red, White & Blue Scrap kit by Jessica
of Gothic Inspirations, which you can purchase here

Jessica's site has so many wonderful scrap kits, PTU & Freebies! !!
Thank you Jessica!

Template 12 by Stef at
Freebie Friends Scraps & More, which you can get here
A great PSP'rs site!!

Plug ins: Penta Jeans & Eye Candy gradient glow

Font of choice, I used International Palms

~~~*~~~
Lots of copying and pasting for the template layers-be prepared LOL

Open your template, duplicate and close the original.
Re-size to 850 x 850.
(we will be re-sizing it smaller at the end)
Delete copyright layer
Flood fill raster layer 1 with white.

Select black star layer,
selections>select all> float>defloat >
Copy and paste kit paper 9 as a new layer>
selections invert>delete> select none
and delete the original template layer.

Apply Eye Candy Gradient Glow>
color: Fat default setting.
Now apply a drop shadow
V=3 H=3 O=60 B=5 then
V= -3 H= -3 O=60 B=5

Apply the same steps to raster layer 2,
but use paper 13,
and on raster layers 3 & 4 using paper 1.

Now, with the magic wand, select inside the first star layer you made
(it was black star) and copy>paste your tube.
Position and invert>delete.
Apply Penta Jeans: Amount>62 Width>4
Change the blend mode to soft light.

Select with the magic wand the Big Top &
big B stars layers and flood fill white.
Apply drop shadow V=3 H=3 O=60 B=5

Select stars layer float>defloat >
Copy and paste kit paper 3 as a new layer>
selections invert>delete>
select none and delete the original template layer.
Apply drop shadow V=3 H=3 O=60 B=5

Copy>paste your tube,
mirror and position to the left of the tag.
Apply the same gradient glow and
drop shadows as the other layers.

Open flower red, re-size 50%
and paste on bottom left side of the template
(see my tag for placement)
Apply the same gradient glow
and drop shadows as the other layers.

Open flower blue2, re-size 50% and
paste on bottom left side of the template
(see my tag for placement)
Apply the same gradient glow and
drop shadows as the other layers.

Open stars3, re-size 75% and place next to red flower.
Apply the same gradient glow and drop
shadows as the other layers.

Duplicate>mirror each of these 3 layers.

Open wordart and re-size 75%
and paste over flower layer>apply the same gradient glow
and drop shadows as the other layers.

Copy>paste glitterspray blue above
raster layer1 and move to top left of tag.

Copy>paste glitterspray red&blue above
raster layer1 and move to bottom right of tag.

Open pass4th and re-size 50%>paste on blue flower
on left side and rotate 15 degrees left>apply
the same gradient glow
and drop shadows as the other layers.

Copy>paste cluster pin
on upper right corner of the template
and erase the pin part covering the
corner (see my tag)

Add a new raster layer and add your name in script,
rotate 15 degrees left and position to your liking.
Apply the same gradient glow and
drop shadows as the other layers.

Resize your tag to 600 x 600,
add your name and copyright if needed
delete your white layer and
save as a PNG and your finished!

Now go grab some fireworks and have a Happy 4th of July!!!