Click on the image to see the full size preview
I use PSP 7, but assume this can be made with any version
I use PSP 7, but assume this can be made with any version
Supplies:
Tube of choice, I used the artwork of Martin Abel,
you must have a license to use his work which is available at CILM
FTU Scrapkits: Down LaPush and Twighlight by Sunf at Urban Fairytales here
Check out her blog while you are there, she has so many goodies!! Thank you Sunf!!
Font of Choice, I used a grunge style font
~~~*~~~
Drop shadow used throughout: 3/3/50/5 Black
Open a new image 650 x 650, floodfill white
Add in frame UFlapushclusterframe
Using the magic wand tool, click inside the frame, selections modify expand by 12
paste lapush paper1 as new layer, selections invert, delete and
Move this layer below your frame layer. Now with the frame still selected copy and paste your tube of choice as a new layer and hit delete, select none and move this below your frame layer.
Open UFleavesLapush and paste as new layer above your bottom layer,
position at the upper left side of the frame
(see my tag for referance) add drop shadow. Duplicate layer, flip and move a bit to the right. Duplicate this layer twice, and mirror both, position along right side of frame.
Open UFfoligelapush and paste above other leaves layers,
rotate to the left 90 degrees and position.
Open UFLapushmist and paste over your leaves layer, position to your liking.
Open UFbutterflycluster and paste above the mist layer. Apply drop shadow
Now embellish with the accents of your choice,
I used UFTwilightflowers1, 2 and 3 from her Twighlight kit.
Resize the tag if needed and add your name.
I resized the element UFLapushmist and placed over part of my name.
Add your copyright and watermark. Delete the bottom white layer and save as a PNG
and you are finished!
I hope you enjoyed my first tutorial!
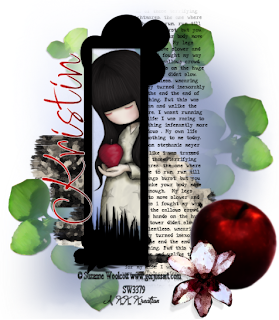
Here's a tag my friend Kristin made-
her first time following a tut!
She did a great job on it!!
 (Click on tag to view full size)
Tube of choice, I used the artwork of Martin Abel,
you must have a license to use his work which is available at CILM
FTU Scrapkits: Down LaPush and Twighlight by Sunf at Urban Fairytales here
Check out her blog while you are there, she has so many goodies!! Thank you Sunf!!
Font of Choice, I used a grunge style font
~~~*~~~
Drop shadow used throughout: 3/3/50/5 Black
Open a new image 650 x 650, floodfill white
Add in frame UFlapushclusterframe
Using the magic wand tool, click inside the frame, selections modify expand by 12
paste lapush paper1 as new layer, selections invert, delete and
Move this layer below your frame layer. Now with the frame still selected copy and paste your tube of choice as a new layer and hit delete, select none and move this below your frame layer.
Open UFleavesLapush and paste as new layer above your bottom layer,
position at the upper left side of the frame
(see my tag for referance) add drop shadow. Duplicate layer, flip and move a bit to the right. Duplicate this layer twice, and mirror both, position along right side of frame.
Open UFfoligelapush and paste above other leaves layers,
rotate to the left 90 degrees and position.
Open UFLapushmist and paste over your leaves layer, position to your liking.
Open UFbutterflycluster and paste above the mist layer. Apply drop shadow
Now embellish with the accents of your choice,
I used UFTwilightflowers1, 2 and 3 from her Twighlight kit.
Resize the tag if needed and add your name.
I resized the element UFLapushmist and placed over part of my name.
Add your copyright and watermark. Delete the bottom white layer and save as a PNG
and you are finished!
I hope you enjoyed my first tutorial!
Here's a tag my friend Kristin made-
her first time following a tut!
She did a great job on it!!
 (Click on tag to view full size)


0 comments:
Post a Comment