
Click on image to view full size
If you share this tut in a group, please leave me a link
in my chat box! Mahalo!!
I use PSP 7, but assume this can be made with any version
Supplies:
Tube of choice
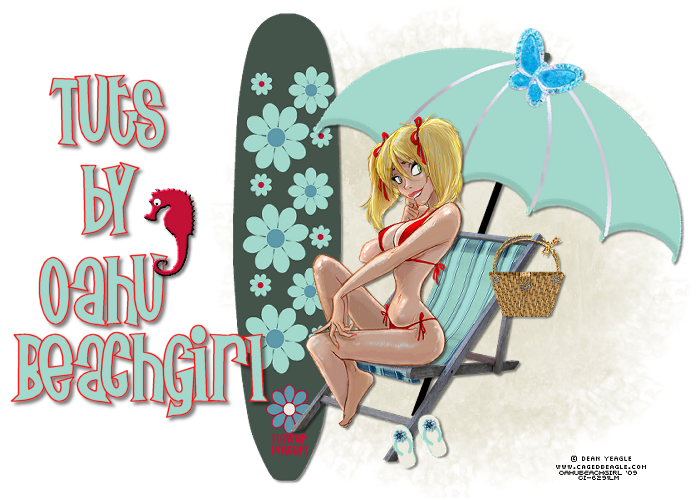
I used the wonderful art of Jennifer Janesko,
you must have a license to use her work which you can purchase at CILM
FTU scrap kit "Go Ahead and Dream" by Bel Vidotti ,
which you can download here
Thank you Bel !
Mask 04 by Chelle aka Weescotlass which you can find here
(this is one of my fav masks LOL)
Font of choice, I used Inspiration
~~~*~~~
This one is quick and easy!
Open a new image 800 x 800, flood fill white.
Copy > paste Glitter frame as new layer.
Add a drop shadow > 3/3/50/5.
Effects > Xenofex 2 > constellation with these settings:
5.19
23
5
12
69
58
rotation: 45
With the magic wand, select inside the frame,
modify > expand 12 pixels.
Copy > paste paper PP03 as a new layer >selections invert > delete >select none.
Move this layer below the frame layer.
X out your white layer and merge visible the frame and paper layer
re-size 125% and make your white layer visible again.
Copy > paste your tube and place in center of frame
(see my tag for placement) Resize your tube if needed
and add a drop shadow.
Copy > paste cloud04 and position at the bottom of your tube.
Copy > paste moon2 as a new layer and re-size it
80%, position at the top left of your tag.
Copy > paste string 03 and place below your moon layer > dropshadow.
Copy > paste paper PP13 above your bottom white layer.
Apply mask 04 >delete mask. Copy > paste Sparkles
above mask layer >duplicate layer > flip.
Now resize your tag to 600 X 600.
Add your name, and your copyright if needed,
delete your white layer and save
as a PNG and that's it!!
I hope you enjoyed this tut!!
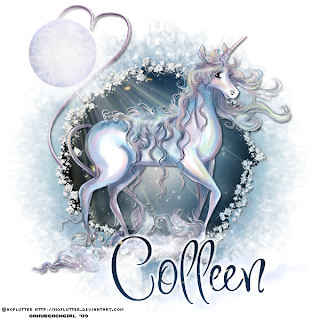
I had a good friend request a unicorn tag, so I used this tut for it too:
If you share this tut in a group, please leave me a link
in my chat box! Mahalo!!
I use PSP 7, but assume this can be made with any version
Supplies:
Tube of choice
I used the wonderful art of Jennifer Janesko,
you must have a license to use her work which you can purchase at CILM
FTU scrap kit "Go Ahead and Dream" by Bel Vidotti ,
which you can download here
Thank you Bel !
Mask 04 by Chelle aka Weescotlass which you can find here
(this is one of my fav masks LOL)
Font of choice, I used Inspiration
~~~*~~~
This one is quick and easy!
Open a new image 800 x 800, flood fill white.
Copy > paste Glitter frame as new layer.
Add a drop shadow > 3/3/50/5.
Effects > Xenofex 2 > constellation with these settings:
5.19
23
5
12
69
58
rotation: 45
With the magic wand, select inside the frame,
modify > expand 12 pixels.
Copy > paste paper PP03 as a new layer >selections invert > delete >select none.
Move this layer below the frame layer.
X out your white layer and merge visible the frame and paper layer
re-size 125% and make your white layer visible again.
Copy > paste your tube and place in center of frame
(see my tag for placement) Resize your tube if needed
and add a drop shadow.
Copy > paste cloud04 and position at the bottom of your tube.
Copy > paste moon2 as a new layer and re-size it
80%, position at the top left of your tag.
Copy > paste string 03 and place below your moon layer > dropshadow.
Copy > paste paper PP13 above your bottom white layer.
Apply mask 04 >delete mask. Copy > paste Sparkles
above mask layer >duplicate layer > flip.
Now resize your tag to 600 X 600.
Add your name, and your copyright if needed,
delete your white layer and save
as a PNG and that's it!!
I hope you enjoyed this tut!!
I had a good friend request a unicorn tag, so I used this tut for it too:


0 comments:
Post a Comment